Open topic with navigation (left menu)

The attendance feature allows teachers to keep track of attendance at course level and provide mentors with an overview of a participant's attendance across multiple courses. For teachers, attendance is managed under Status and follow-up in the navigation tree for a course, while mentors have an Attendance link under the Mentor tab.
Before you start tracking attendance, you must make sure that:
See how it works (content does not use sound)
Before you can start using the attendance function, the administrator must set up categories and attendance codes. The categories and codes are available to all courses in the organisation. A set of default categories and codes is available. Administrators can manage them from the Admin tab >> Edit global settings >> Attendance.
The categories are used to group the attendance codes. Examples of categories are Present, Excused absence, and Unexcused absence. See how-to
The attendance codes are abbreviations for the absence status – LAT for ‘Late’, ABS for ‘Absent’, and so on. The attendance codes always belong to an attendance category. See how-to
When everything is ready on the administrator’s side, the teacher has to add terms – or time periods – to the course. See how-to
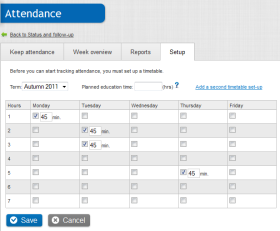
After having added terms, click the Setup tab. When you mark the timetable, you select the class hours for your course – for example, the first hour on Monday, and the second and third hour on Tuesday. If you change an existing timetable, the changes are effective from the date of the change.
In the Planned education time field, enter the total number of class hours in the course for the relevant term. The number of class hours is used by itslearning to calculate attendance statistics for the course. The absence rate is not calculated from the number of hours and minutes the participant has been absent. The calculation is the percentage of the number of teaching sessions for which the participant has been absent measured against the total number of sessions set up for the term.
Add a second timetable set-up: If the class hours vary from week to week – for example, teaching is done every second week – you can use the set-up option for adding a second timetable to specify another schedule for alternate weeks.
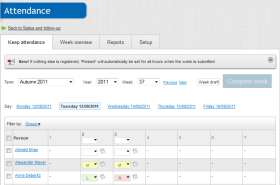
Note that only absence is tracked – no action is required if all participants are present. The system will automatically set the status to 'Present' when the records for a week are submitted to the mentor.
To monitor attendance, click Status and follow-up >> Attendance >> the Keep attendance tab. Make sure you have selected the correct term, week, and day. Absence is kept by clicking the drop-down box and selecting the proper absence code. You may also want to enter a comment on the absence by clicking the grey note.
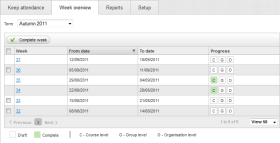
When you are finished noting the attendance for a week, you submit the week to the mentor by checking the boxes in front of the weeks you want to submit, then click the Complete week button. This means that your job is done. Note that you have to submit the week even if no absence is recorded.
The codes in the progress column indicate who has approved the attendance at course level, group level, and organisation level. Teachers approve attendance at course level. The attendance information would typically be approved on the group level by a mentor and on the organisation level by a head teacher. The set-up may vary from school to school. The various levels turn green when they are approved.
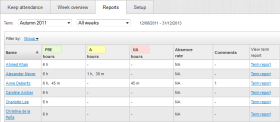
The Reports tab provides an overview of all absence from the course, including absence rates. If you click the name of a learner, a detailed report on the absences of that learner is shown.
The screenshot below shows an individual learner report.
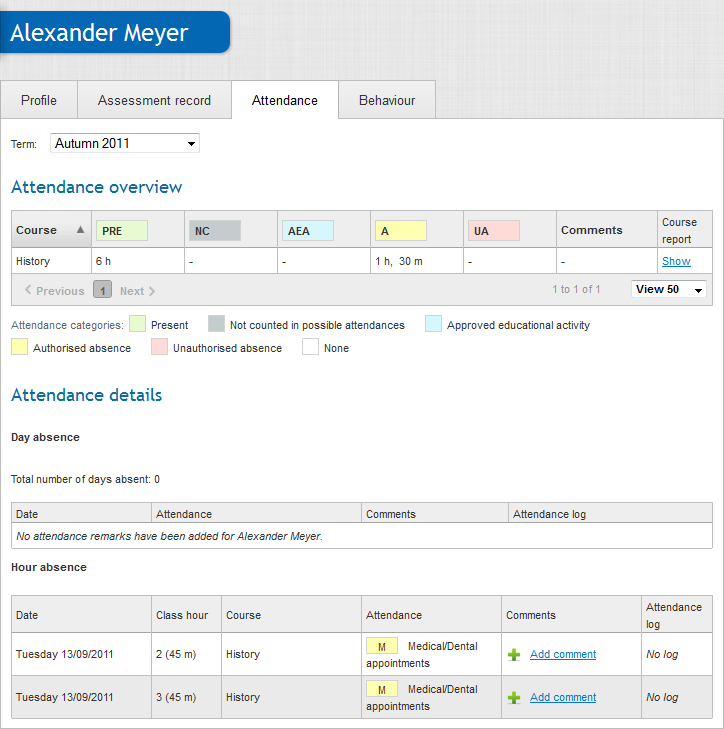
The mentors see the absences for all their participants across courses, which provides a good overview. Mentors are allowed to edit the absence data submitted by the teacher, and to set ‘day absence’ if a participant has been absent all day, or for a session. To manage attendance, mentors click the Mentor tab >> Manage attendance.
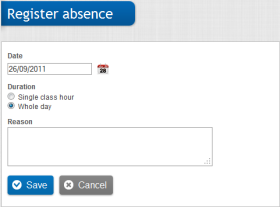
Learners are allowed to notify teachers about planned absence in advance with a few simple clicks of the mouse. This saves time for teachers, who no longer have to spend time searching for the reasons for scheduled absence. The learner registers absence by clicking ePortfolio >> Attendance >> Register absence.
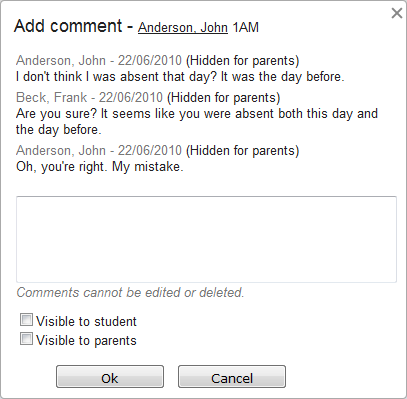
Learners are allowed to comment on the attendance remarks. All comments are shown as a log when you click the comments icon. It is possible to hide comments from parents and/or learners. Learners, mentors, teachers, and parents are notified about new comments through the internal messaging system and thus also on the main dashboard.
